Continuing this week's vacation theme, today's how-to is about something that, for me, is a HUGE part of traveling: Taking Pictures!
I take tons of photos when I travel and the more I've learned, the better my shots have gotten! In my opinion there are three major steps to taking the best pictures you can: Master the Manual setting on your camera, Look Around You, and HAVE FUN!
I take tons of photos when I travel and the more I've learned, the better my shots have gotten! In my opinion there are three major steps to taking the best pictures you can: Master the Manual setting on your camera, Look Around You, and HAVE FUN!
First: Master Manual
This first step is by far the most difficult of what I'm talking about, but also one of the most rewarding. The manual setting on your camera can be your best friend or your worst enemy. If you don't know how to use it, you can get a bunch of awful shots. But if you conquer it, it will take your pictures to a whole new level. Most cameras have a manual setting, even point & shoot ones. (If you're looking into buying a new camera, I can't recommend Canon highly enough. Even their simple powershot is Bomb!) To shoot in manual there are 3 basic things you need to know:
SHUTTER SPEED: Shutter Speed is pretty easy - it is how fast or slow the shutter closes when you press the button. The faster the shutter speed, the better the camera will freeze the action. Along with the other settings, shutter speed also effects the amount of light that hits the sensor. The faster the shutter speed, the less light comes into the camera. So if it's dark out and your subjects are still, slow down the shutter speed, and if it's bright with fast motion, vise versa. ISO: ISO is the sensitivity to light. The higher the ISO speed, the more light your camera's sensor can pick up. For example, if your ISO is set to 1600, you can get a much better exposed shot at night or in a dark area than you could if it was at 400. I generally have my ISO at the highest setting on my camera (1600), but a general good rule of thumb is to have it at about 200-400 outdoors and 400+ indoors or at nighttime. Having it at the highest setting can sometimes downgrade the ultimate image quality.
APERTURE/F STOP: Aperture is basically an adjustable opening in the lens that controls the amount of light that gets let in to the camera. One of the confusing things about this is that it is measured in F stops that have the larger opening correlating with a smaller number, and smaller openings matched with bigger numbers. Also, aperture deals with your depth of field which is super important. Since its one of the more confusing elements, if you wanna learn more, here's a little article that might help.
The most important thing about these tips is: PRACTICE!
The more you practice, the easier it is, and the cooler your shots will be!
AND - Here are 7 Beginner Photography Tutorials to help you out!
AND - Here are 7 Beginner Photography Tutorials to help you out!
Second: Look Around You!
This may seem like an obvious one, but sometimes, especially if you're on a schedule or looking at a map, you can forget to really take in everything around you! Look up and see what kinds of cool skylines there are! Look down and see flowers or street art on the sidewalks! You might be surprised at all the things you'll find!
Third: Have Fun!
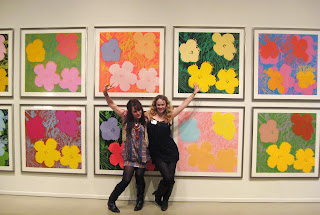
Have a blast with your shots! Take candids, don't be afraid to take as many as you want, go for a huge variety! Think about unique framing - take one picture 3 different ways. Be in the moment! Seize opportunity! One of my favorite pictures is one of my best friend and I in front of a wall of Warhol paintings in an exhibit. We were stopped by the guards immediately after taking it, but we got the shot!
Think outside the box and keep in mind that these are your memories! Make them your own!


No comments:
Post a Comment